If you’ve cleaned a pet-urine spot, the smell went away for a few days, and then it came back on a humid afternoon, then this is for you. You didn’t do anything wrong. You just treated the wrong layer.
What pet urine actually is
Fresh dog or cat urine is roughly 95% water, 5% urea, uric acid, creatinine, and bacteria. The water evaporates fast. The rest of it doesn’t go anywhere. It crystallizes into salts that bond to whatever surface the urine landed on. That’s why the stain darkens over time and why the smell persists.
Those crystallized salts are hygroscopic, meaning they absorb moisture from the air. On a humid day, they rehydrate, and the bacteria that were dormant start metabolizing the salts again. The byproduct is ammonia and sulfur compounds. That’s the smell.
You can’t clean urine salts out with soap and water. You need an enzyme or bacteria that actually digests the urea and breaks it down into something water-soluble. That’s the chemistry step.
The three layers you’re dealing with
Here’s what most people miss. When a dog or cat has an accident on carpet, gravity does its thing fast:
- The face yarn (the part you see). Gets some of the urine; most runs through to the layer below.
- The carpet backing. Made of woven polypropylene, water passes through it immediately. Holds residue.
- The carpet pad. Foam or fiber, highly absorbent. Holds the majority of any significant deposit.
- The subfloor. Plywood or concrete. Takes the overflow when deposits are large or repeated.
Surface cleaning only treats layer 1 and sometimes layer 2. The contamination is mostly in layers 3 and 4. That’s why the smell returns. The treated face yarn is fine, but the untreated pad and subfloor continue to release ammonia as the salts rehydrate.
The full protocol that actually works
When we do a real pet-odor job, this is the order:
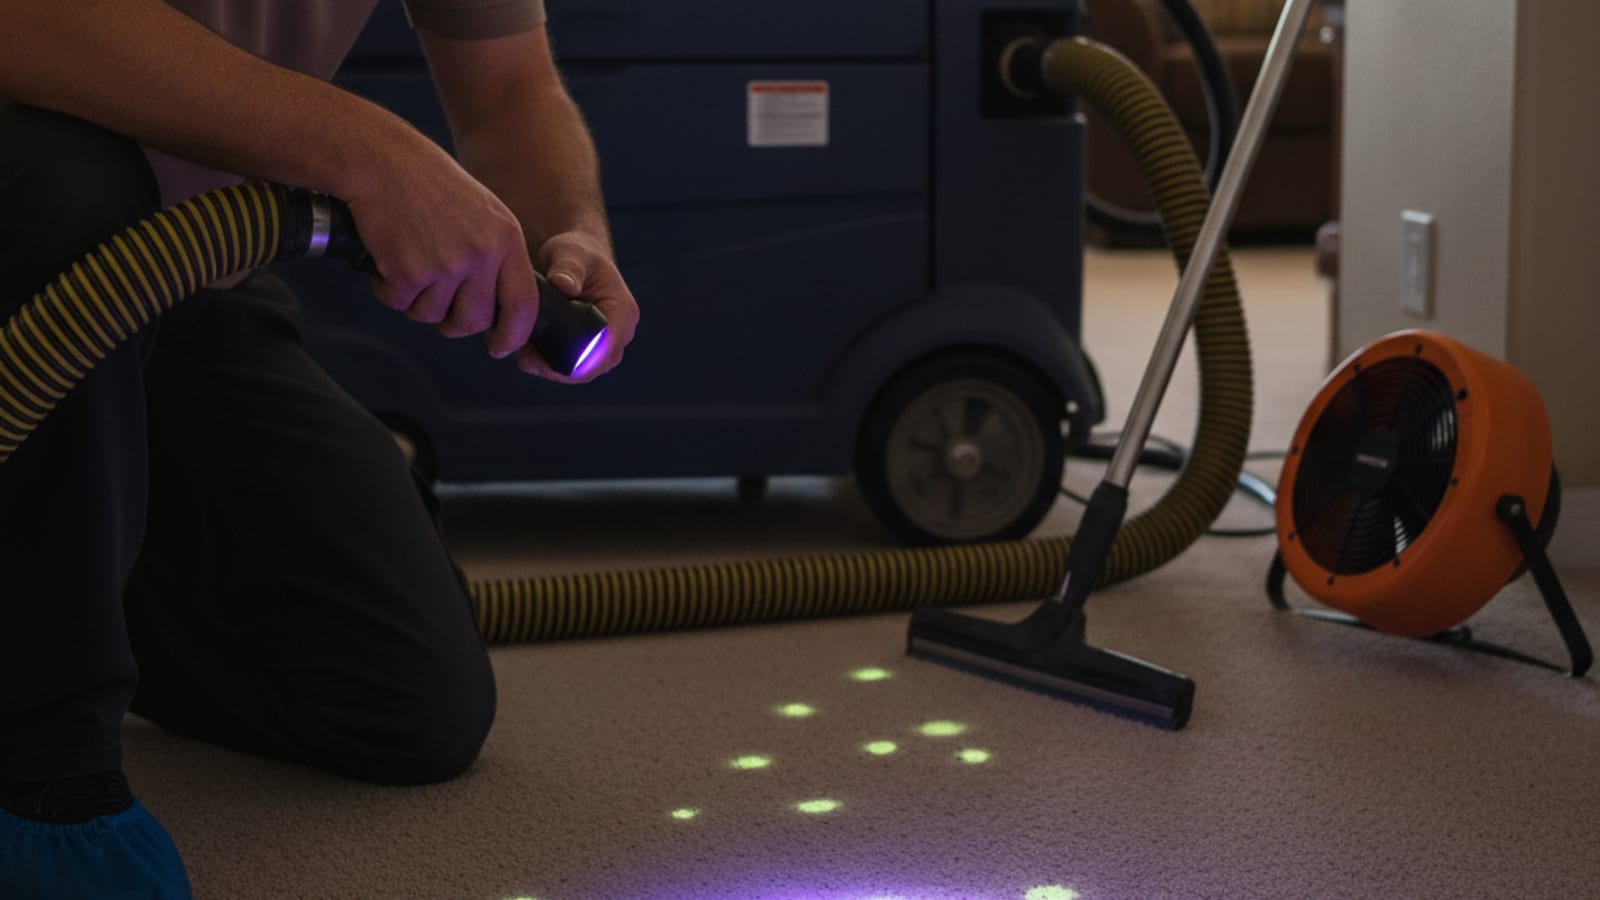
Step 1: UV black light inspection
Dried urine salts fluoresce under UV light. We darken the room and pass a professional UV lamp over the carpet. Every deposit shows up as a pale-yellow glow. We photograph and map them so we know the full scope. Clients are often surprised how many spots there are, because dogs especially return to the same general area.
This alone is worth the service call. You can’t treat what you can’t find.
Step 2: Moisture meter on each deposit
We press a pin-style moisture meter through the carpet into the pad and subfloor at every spot. This tells us whether the contamination went all the way down or stayed near the surface. A reading over 20% on pad or subfloor is a flag for layer-3 or layer-4 protocol.
Step 3: Enzyme pre-treatment
The carpet (and on worse spots, the pad below) gets a heavy soak of a protein-specific enzyme. Not the $8 grocery-store kind, but a concentrated commercial formula. The enzyme needs dwell time: we let it sit for 15–30 minutes to digest the urea. This is the step most DIYers skip because it doesn’t look like “cleaning,” but it’s the actual work.
Step 4: Sub-surface extraction
A specialized tool (water claw, deep extractor) pulls contamination from the pad without removing the carpet. Hot clear-water rinse under pressure, immediately extracted back. For moderate cases, this handles the pad without replacing it.
Step 5: Pad replacement on severe cases
If the moisture meter shows heavy pad saturation or multiple overlapping deposits in one spot, surface work won’t be enough. We pull back the carpet in that area, cut out the contaminated pad, treat the subfloor, and install fresh pad. We re-lay the carpet and re-stretch as needed. It sounds invasive, it’s a few hours of work and saves you from replacing the entire carpet later.
Step 6: Subfloor sealing
On the worst cases (cat urine on wood subfloor is especially penetrating), we apply an odor-blocking sealer. Kilz-grade or better, to the subfloor before laying new pad. This locks in any residual contamination below the sealant line. One-time treatment.
Step 7: Hot-water extraction of the carpet
With the pad situation handled, we run truck-mounted extraction across the cleaned area to finish. This time the extraction is removing enzyme residue and any remaining surface contamination.
Step 8: Post-treatment odor check
Handheld odor meter, moisture meter re-check, visual UV re-scan. If any of these flag, we treat again before we leave.
What you should never do
Based on hundreds of jobs where we’ve come in to fix DIY attempts:
- Don’t pour vinegar on pet urine. Vinegar is acetic acid; it neutralizes the ammonia smell temporarily but doesn’t break down the salts. The smell comes back worse once the vinegar evaporates.
- Don’t use bleach or hydrogen peroxide on dyed carpet. You’ll trade the urine stain for a bleached-out lighter patch, which is permanent.
- Don’t use a carpet shampoo machine on pet spots. A DIY machine applies more water, which activates more salts. If you’ve made the smell worse after cleaning it, this is what happened.
- Don’t cover it with baking soda long-term. Baking soda is fine for a quick deodorize before a showing but it doesn’t neutralize urine salts; it just sits on top and absorbs loose odor molecules.
- Don’t mask with heavy fragrance. Plug-in air fresheners and scented sprays only cover the smell for a few hours and can make it worse by adding moisture/alcohol to the spot.
The DIY version for fresh accidents only
If the accident just happened and you got to it within 15 minutes, you have a real shot at handling it yourself:
- Blot, don’t rub. Press a clean towel straight down and hold. Change towels as they absorb. Don’t scrub, or you’ll push urine deeper.
- Apply a commercial enzyme cleaner (Nature’s Miracle and Rocco & Roxie are both legitimately good). Saturate the area as heavily as the bottle allows. The dwell time is the job, so let it sit 20 minutes.
- Blot again to extract what comes back up.
- Cover with a damp towel while it dries so the enzyme keeps working instead of evaporating.
This works for one-off accidents in the first hour. For older deposits, multiple spots, or repeat offenders, the layered protocol above is what’s needed.
When to call a pro
Call if:
- The smell is audible from another room
- More than a couple of spots on UV inspection
- You can still smell it after multiple cleanings
- You’re selling the house and a buyer’s inspector will sniff the carpet
- You have a cat who’s been “going” on the same spot for months
- Multi-pet household where accidents are weekly
- You just inherited or bought a property with prior pet damage
Getting it handled once with the full protocol is cheaper than replacing carpet. The calculation is clear: $279–499 per room for full treatment vs. $2,500–5,000 for new carpet and pad in a three-bedroom home.
A note on cat urine
Cat urine is different enough from dog urine that it deserves a separate note. Cat urine is more concentrated, more acidic, and contains felinine (a protein that breaks down into sulfur compounds). It’s why cat urine smells worse over time where dog urine mostly fades.
Cat urine protocols are the same sequence but more aggressive on enzyme dwell time and more likely to require subfloor sealing. If you’re smelling a spray-marker cat on a hard surface (baseboards, door frames, upholstery), those spots need treatment too, since cat spray is almost always a multi-surface job.
Moving forward
The good news: once a spot is properly treated, it stays treated. The pad doesn’t re-contaminate spontaneously. If you have a dog or cat that’s still having accidents, preventing new deposits is a behavior issue, not a cleaning issue, and the two get addressed in very different ways.
We’re happy to come do the assessment at no charge for jobs over $279. We’ll find the spots, tell you honestly whether surface treatment is enough or pad replacement is needed, and give you a written quote before starting.
Call (858) 925-5546 or request a visit. Serving all of San Diego County, with priority scheduling for pet-related emergencies.